WELCOME TO HERMITAGE AUTOMATION & CONTROLS

WELCOME TO HERMITAGE AUTOMATION & CONTROLS

How To Cut Aluminum Extrusion

Ever seen those long, shaped metal pieces used in windows, doors, or even building parts? Those are aluminum extrusions. Aluminum extrusions often need to be cut to specific lengths or angles to fit particular applications or design requirements. Cutting these extrusions precisely is key to making perfect, finished products. 

This guide will show you how to cut aluminum extrusion safely and easily using the right tools.
How To Cut Aluminum Extrusion

What Is Aluminum Extrusion

Aluminum extrusion is a technique used to give aluminum alloy a specific shape for different purposes. It’s like molding clay into different shapes, but instead of clay, we use aluminum. The aluminum is heated until it’s soft and then pushed through a specially shaped opening in a die, which determines the final shape of the extruded aluminum profile. Once the aluminum is extruded, it is cooled and hardened to maintain its shape. 
 
This method takes advantage of aluminum’s unique properties. Aluminum is easy to work with because it can be molded and shaped easily. Even though it’s lightweight and not as stiff as steel, when we mix it with other metals, it becomes strong and stable.
 
This method allows for the creation of a wide range of products with diverse shapes and sizes, such as window frames, door frames, and structural components for buildings and vehicles.

Types of Saw Used To Cut Aluminum Extrusion

There are many types of cutter saws available in the market. Here are some of the most popular saws used for different cutting styles for aluminum extrusion
  • Miter saw
  • Circular saw
  • Table saw
  • Band Saw
  • Chop Saw

Which Cutter Saw is Best For Cutting Aluminum Extrusion

The best saw to cut aluminum depends on what kind of aluminum you’re cutting and how thick it is. Here are some saws people generally use.
 
Miter Saw: A miter saw can be a good choice for cutting aluminum extrusions. Just make sure to use a carbide-tipped blade specifically designed for cutting aluminum. This setup can give you clean and precise cuts on aluminum extrusions, which are often straight and relatively thin. 
Remember to secure the extrusion properly and wear appropriate safety gear when operating the miter saw.
Miter Saw

Circular Saw: A circular saw is a great tool for cutting aluminum. To get the best results, use a carbide-tipped blade with lots of teeth. Circular saws are especially good for cutting thick aluminum sheets and plates.

Circular Saw

Table Saw: You can also use a table saw to cut aluminum, especially if it’s big and thick. Just make sure to use a blade with lots of teeth and set the saw to a slower speed. This helps keep the aluminum from getting too hot and bending out of shape.

Table Saw
Band Saw:  A bandsaw is perfect for cutting curvy or weird shapes in aluminum. Pick a blade with lots of fine teeth and set it to a high speed for the best cuts. 
 
Chop Saw: An industrial chop saw is a strong tool that can cut thick metal pieces fast. But it creates a lot of sparks and heat, so make sure to wear safety gear and work in a place with good airflow.
 
Chop Saw

Types of Blades Used To Cut Aluminum Extrusion

  • High-quality carbide blade: Specifically designed for cutting aluminum, ensures clean cuts and reduces blade wear.

  • Bi-metal blade (for band saw): Designed for cutting metal, ensures smooth operation and efficient cutting.

  • Fine-tooth hacksaw blade: Suitable for smaller cuts in aluminum.

  • Aluminum cutting bit (for power router): Specialized bit designed for clean cutting of aluminum.

Safety Gear

  • Safety glasses: Essential to protect your eyes from flying debris.

  • Gloves: Protect your hands from sharp edges and cuts.

Additional Materials

  • Clamps: Secure the extrusion firmly to a stable work surface during cutting.

  • Lubricant (optional): Light oil or cutting lubricant (except for hacksaw) can help reduce friction and heat build-up, especially for thicker cuts.

  • File or Sandpaper: To remove any sharp edges and deburr the cut for a smooth finish.

How To Cut Aluminum Extrusion: Step By Step Guide

This Instruction shows how to cut aluminum extrusion using a miter saw. While various methods exist for cutting aluminum extrusions, here’s the approach we’ve found most effective in our experience. 
 
Cutting aluminum or metal with powerful tools is dangerous and should be attempted with proper safety gears. There is a lot of information available on the internet about cutting aluminum extrusion. You should try and read if this method is right for you.
Cut Aluminum Extrusion

Step 1: Set The Cutting Saw

Install the non-ferrous cutting blade onto the saw, ensuring it’s securely fastened and aligned correctly. It’s important to use a blade specifically designed for cutting materials like aluminum to ensure smooth and accurate cuts.
 
Hermitage is offering advanced miter saw from leading manufacturers specifically for cutting aluminum, which saves having to change the blade every time you need to make a cut.
 
Next, set up the saw in a clean and spacious area where there’s plenty of room to maneuver around. For larger pieces of aluminum extrusion, you might find it easier to set up the saw on the floor to accommodate the size of the material. 
 
However, remember not to plug the saw in just yet to avoid any accidental activation. 

Step 2: Build a Budget-Friendly Dust Collector for Miter Saw

If you enjoy sweeping or have plenty of brooms lying around, you might skip this step. But for the rest of us, pay attention. Cutting aluminum can get messy.

Even if you have a vacuum attached to your miter saw, it might not be enough. The chips from cutting aluminum go everywhere, and they’re sharp and conduct electricity. The picture above shows the mess left inside the beam after just one cut.

To make your life easier, build a dust collector. It doesn’t have to be fancy. For big projects, we hang up tarps a few feet from the saw.

For smaller ones, we build a temporary box around the saw with cardboard angled to push the chips down to the floor.
 
You can use a dust collector with the miter saw for making a less mess from cutting aluminum extrusion. The picture below shows how you can use a dust collector stand with a miter saw.

Step 3: Mark Your Cut Line

Measure from the end of the aluminum piece to where you want to make the cut, and then make a mark. You can use a speed square or a machinist square to draw a straight line on the extrusion at the mark. 
 
Double-check your measurement to make sure it’s accurate. You can mark your cut line using any marking tool you prefer. We like to use a sharp pencil.
Mark Your Cut Line

Step 4: Clamping Workpieces for Safe and Accurate Cuts

This step is super important. The teeth in the blade are a bit slanted, or “offset.” You want to find the longest tooth on the side of the blade that’s facing the part you don’t want to cut. (And remember, the saw should still be unplugged at this point.) 

Line up that longest tooth with the side of the cut line where you’ll be removing material. Clamp the workpiece securely in place. Double-check that the longest tooth is lined up correctly with the cut line. Then, check it again to be sure. Also, check the measurement to the line one more time.
Clamping Workpieces for Safe and Accurate Cuts
Take a good look at the workpiece to make sure it’s sitting square to the blade. If there’s any leftover material on the stage of the saw, it could mess up the angle of your cut.

Step 5: Make The Cut Carefully

The cutting process is pretty straightforward.

First, with your hand OFF the trigger, lower the blade down to the aluminum extrusion and check to make sure nothing moved after you clamped it down.

If everything looks good, go ahead and plug in the saw. Now, with your hand on the trigger, start cutting. Remember to go slow and let the blade do the work. You don’t need to force it down; just apply gentle pressure.

Once you’ve finished cutting, unplug the saw. Release the clamp and measure your cut. If you’re going to make another cut, it’s a good idea to clean up any chips on the working surfaces of the saw. Even a single aluminum chip can mess up the alignment of your cut, so it’s best to clean up between each cut.

Step 6: Clean Up The Mess

Clean Up The Mess
Now that you’re done with the cutting, it’s time to clean up. Give the broom a good workout and sweep up all the debris. Use the vacuum to clean off the miter saw, making sure to get into every nook and cranny. Flip the saw over and vacuum it again to make sure you’ve gotten rid of all the dust and chips.

Clean up the floor around the saw and anywhere else you were working. Remember, those aluminum chips are sharp and can conduct electricity, so it’s important to clean them up thoroughly to avoid any accidents.
 

Choosing The Right Tools For Cutting Aluminum Extrusion

Choosing the right tools for cutting aluminum extrusion is essential for accuracy and efficiency. 

Consider the type of cut needed, such as straight or angled, and select appropriate tools like miter saws, circular saws, or band saws. Use blades designed for aluminum and ensure compatibility with the chosen saw. Prioritize safety features, dust collection options, and accuracy-enhancing features like laser guides. 

Invest in quality tools within your budget to ensure long-term performance and reliable results.

Problems in Cutting Aluminum Extrusion

When cutting aluminum extrusion, several challenges may arise that can affect the quality and efficiency of the process. These challenges include the hardness of the material, chip formation, heat generation, tool wear, surface finish, and dimensional accuracy.

Aluminum extrusion varies in hardness depending on the alloy used, which can impact cutting efficiency and tool wear. During cutting, long, stringy chips may form, potentially interfering with the cutting blade and affecting the quality of the cut. Heat generated during cutting can cause material expansion and warping, leading to inaccuracies in the cut and accelerated tool wear.

Addressing these challenges involves careful consideration of cutting parameters, tool selection, and cutting techniques to ensure optimal cutting performance and quality results when working with aluminum extrusion.

Conclusion

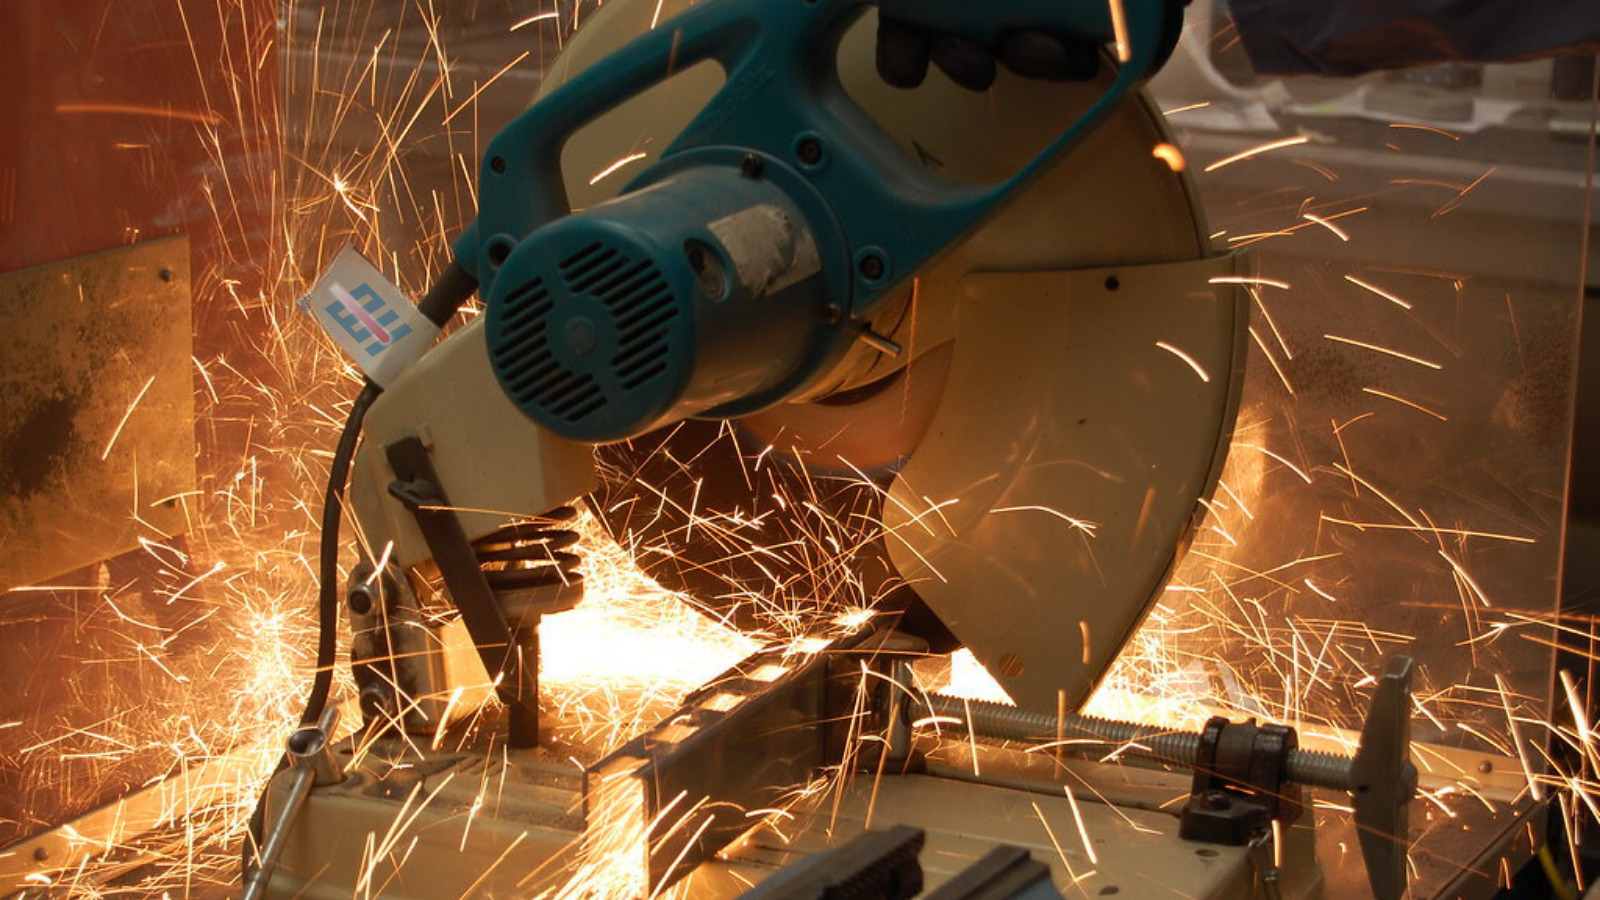
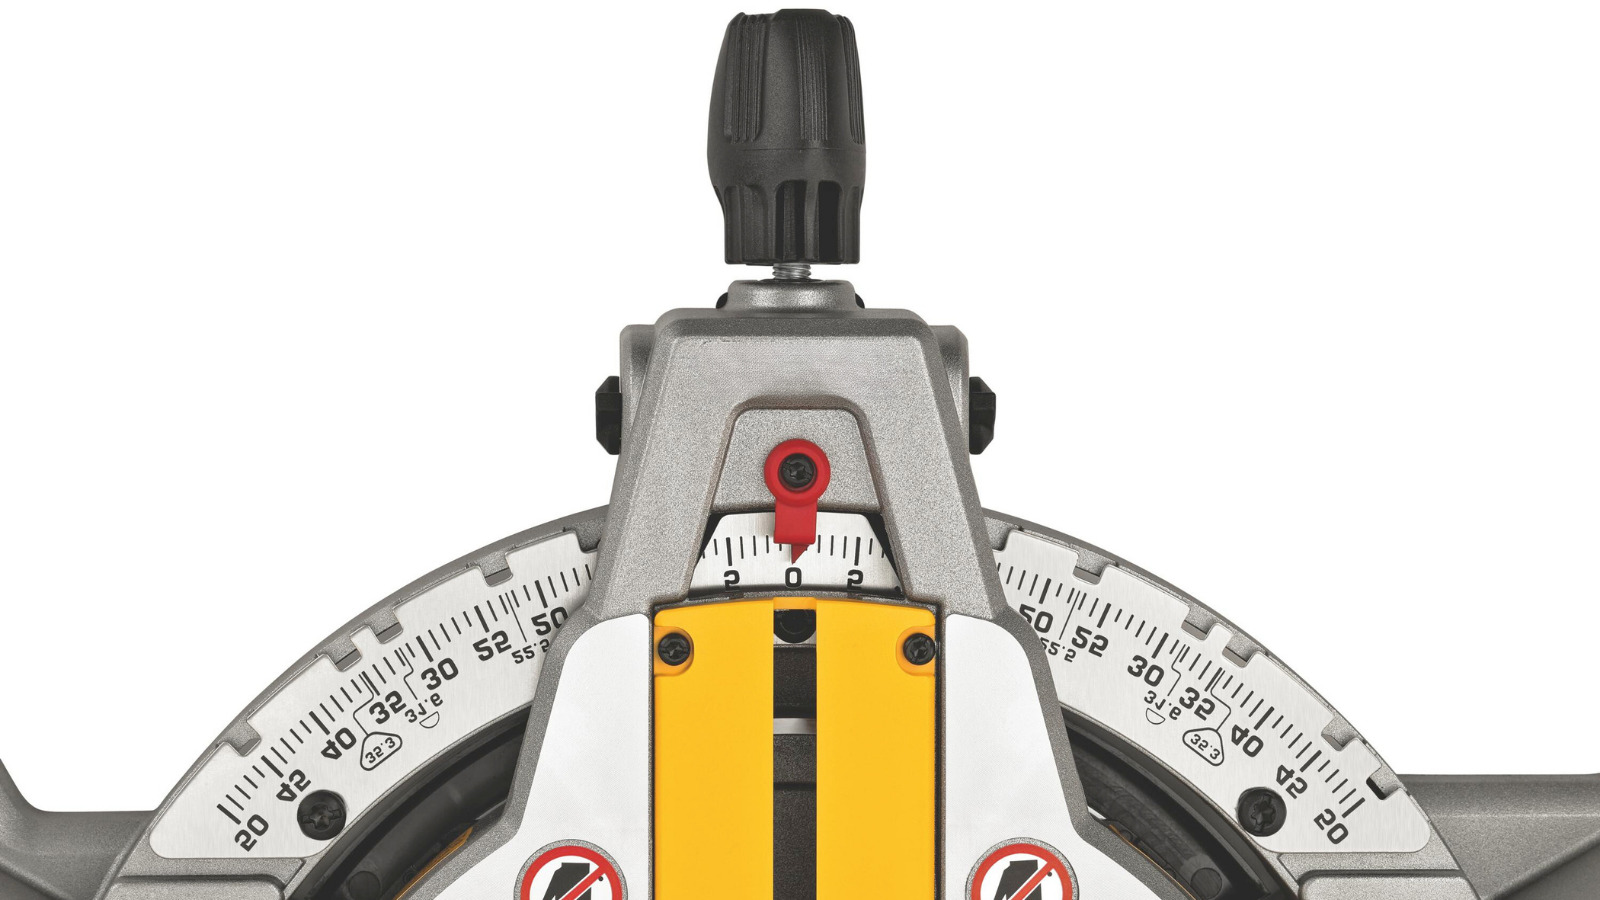
Cutting aluminum extrusion poses several challenges that require careful consideration and appropriate measures to overcome. Factors such as material hardness, chip formation, heat generation, tool wear, surface finish, and dimensional accuracy can impact the quality and efficiency of the cutting process.
 
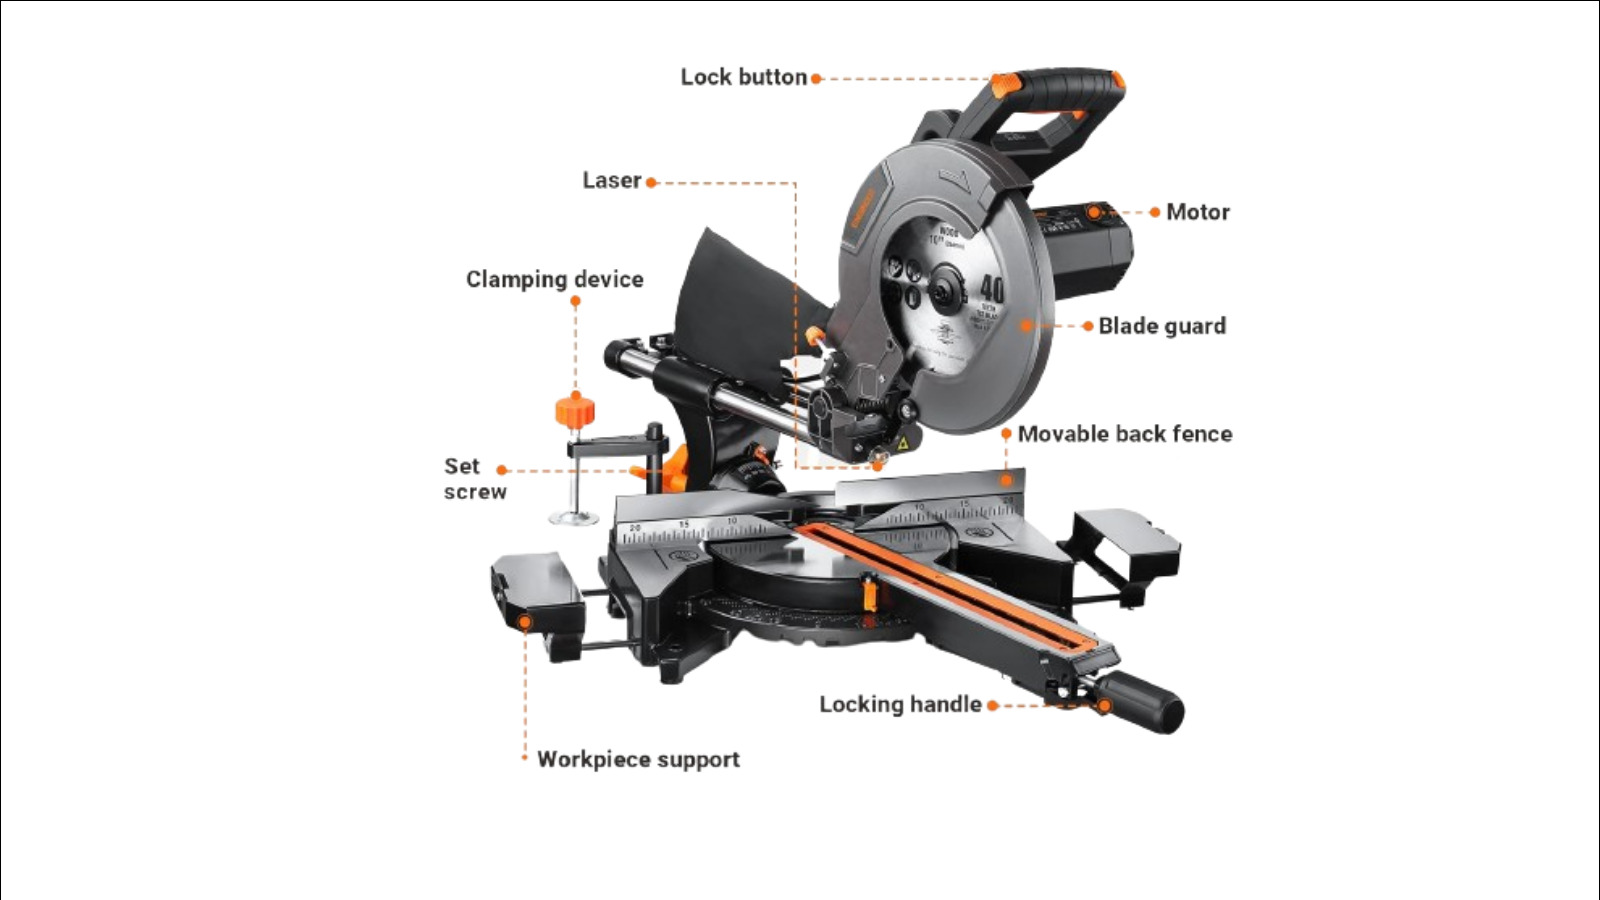
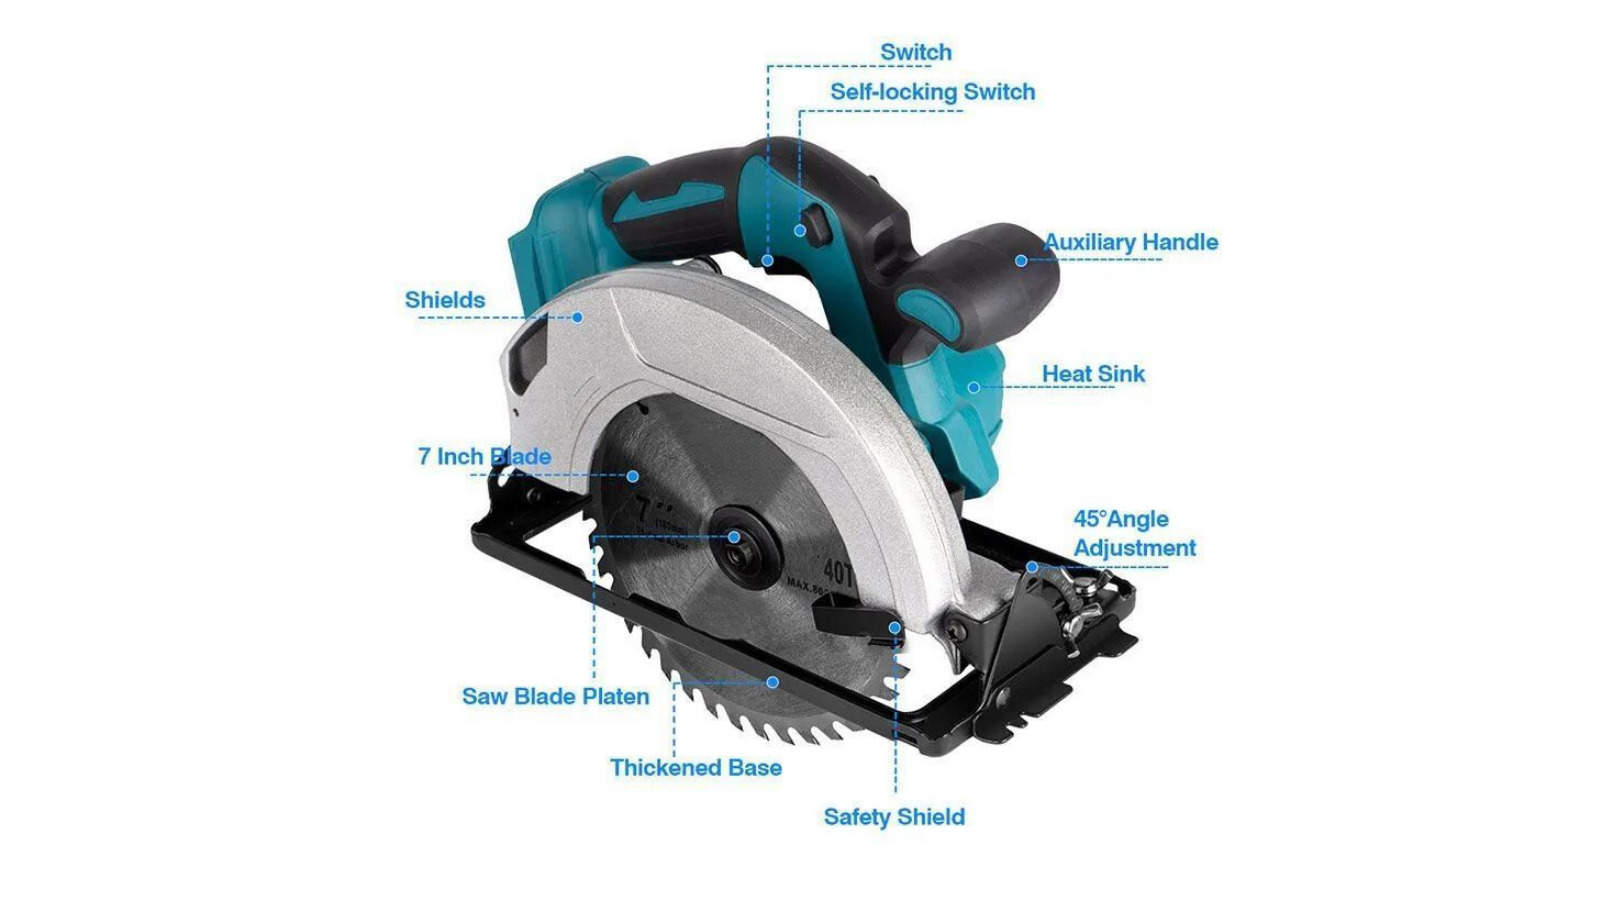
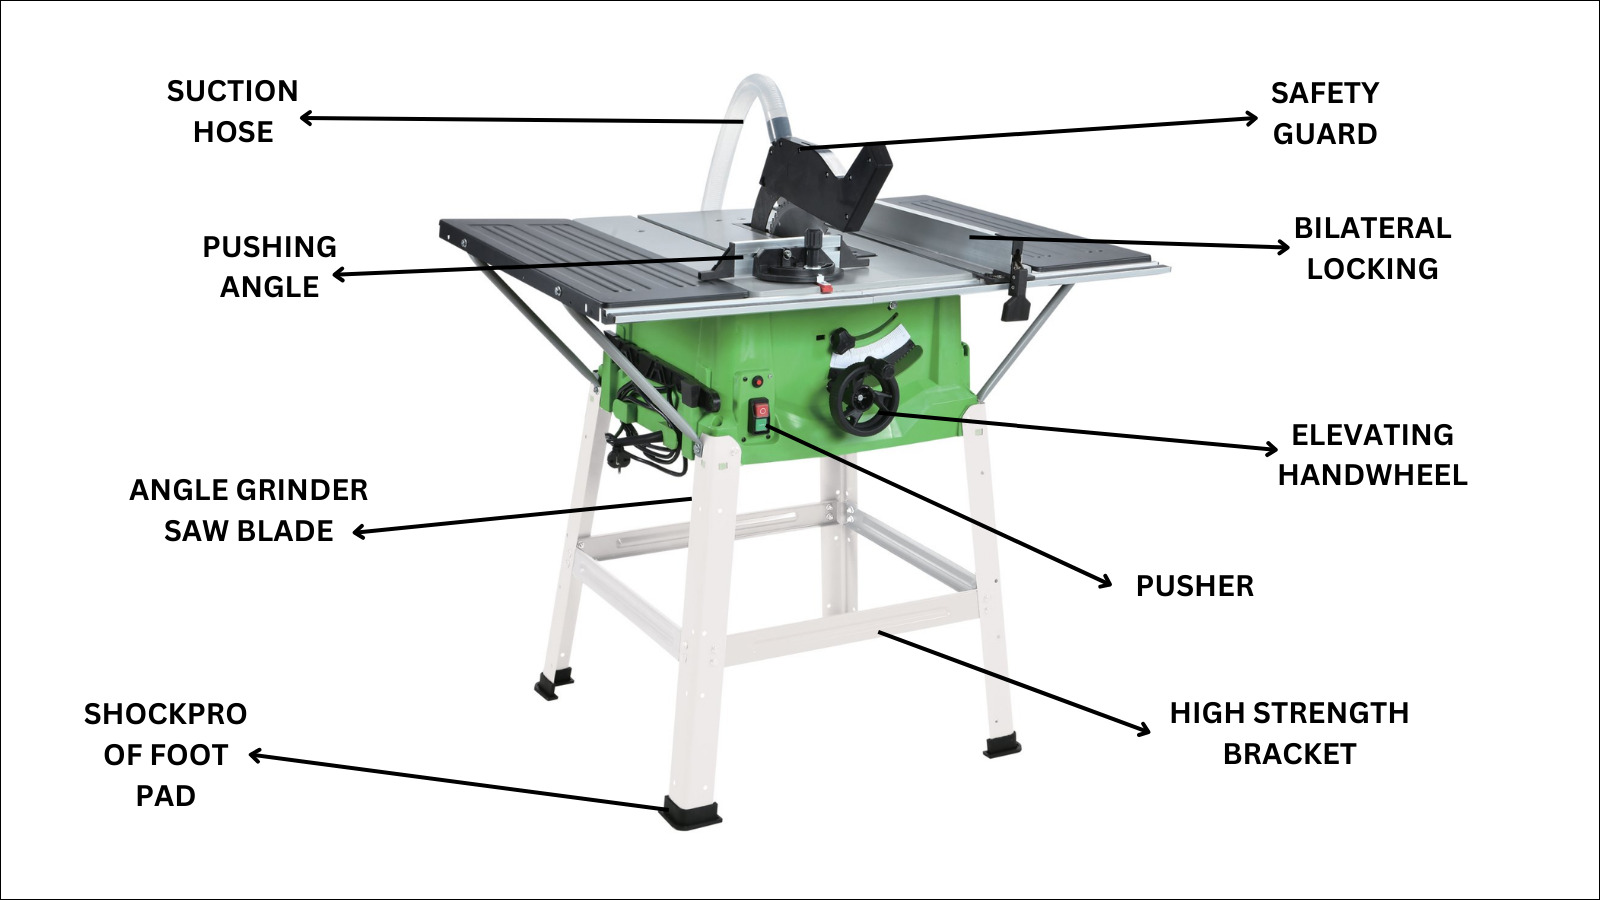
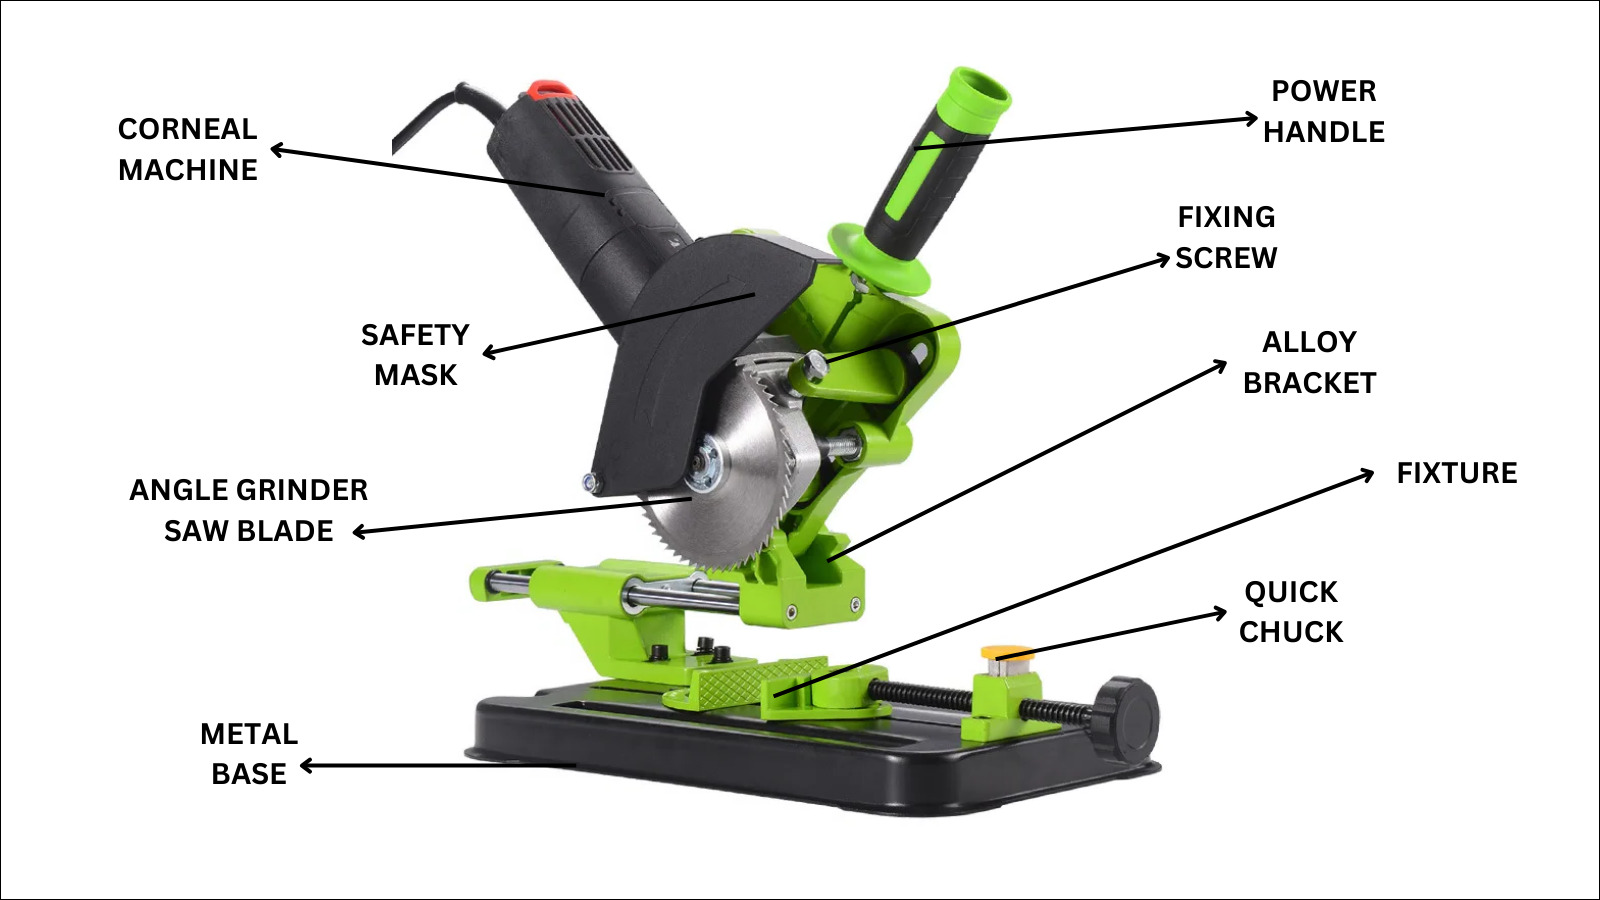
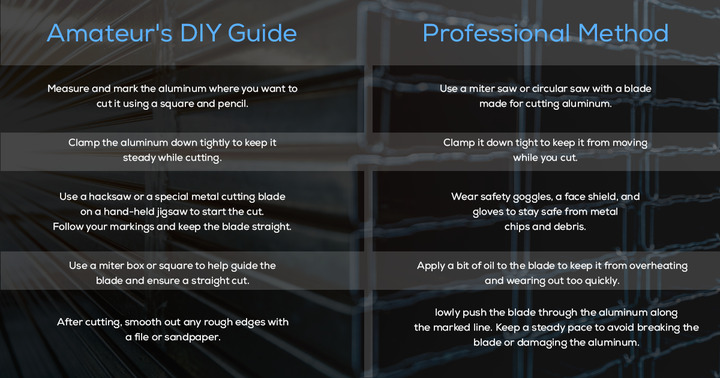
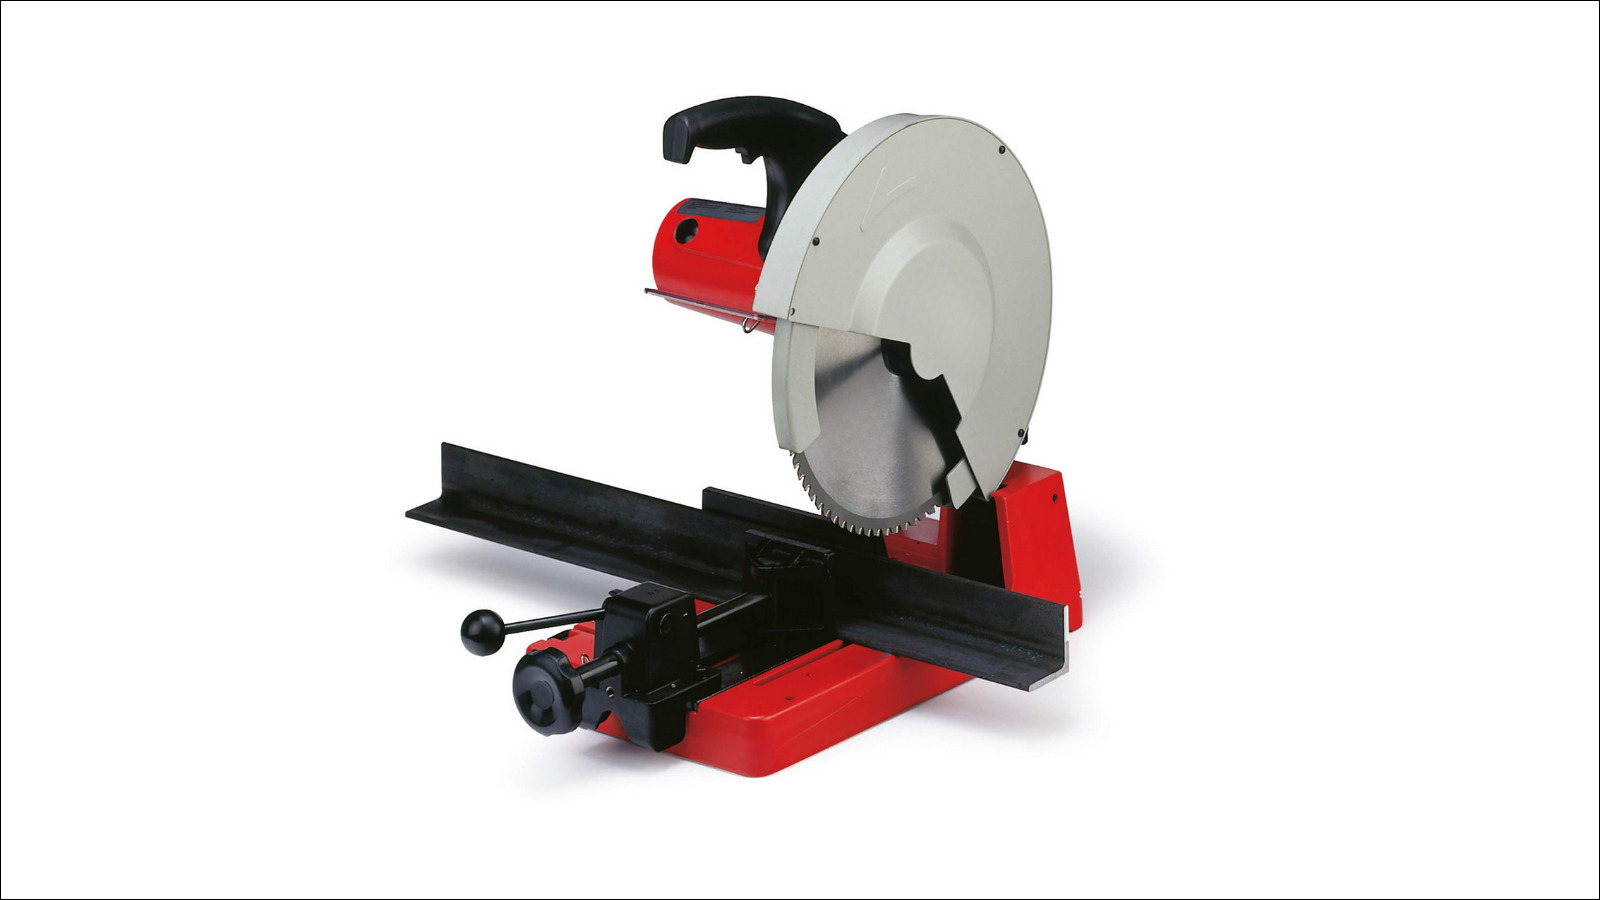
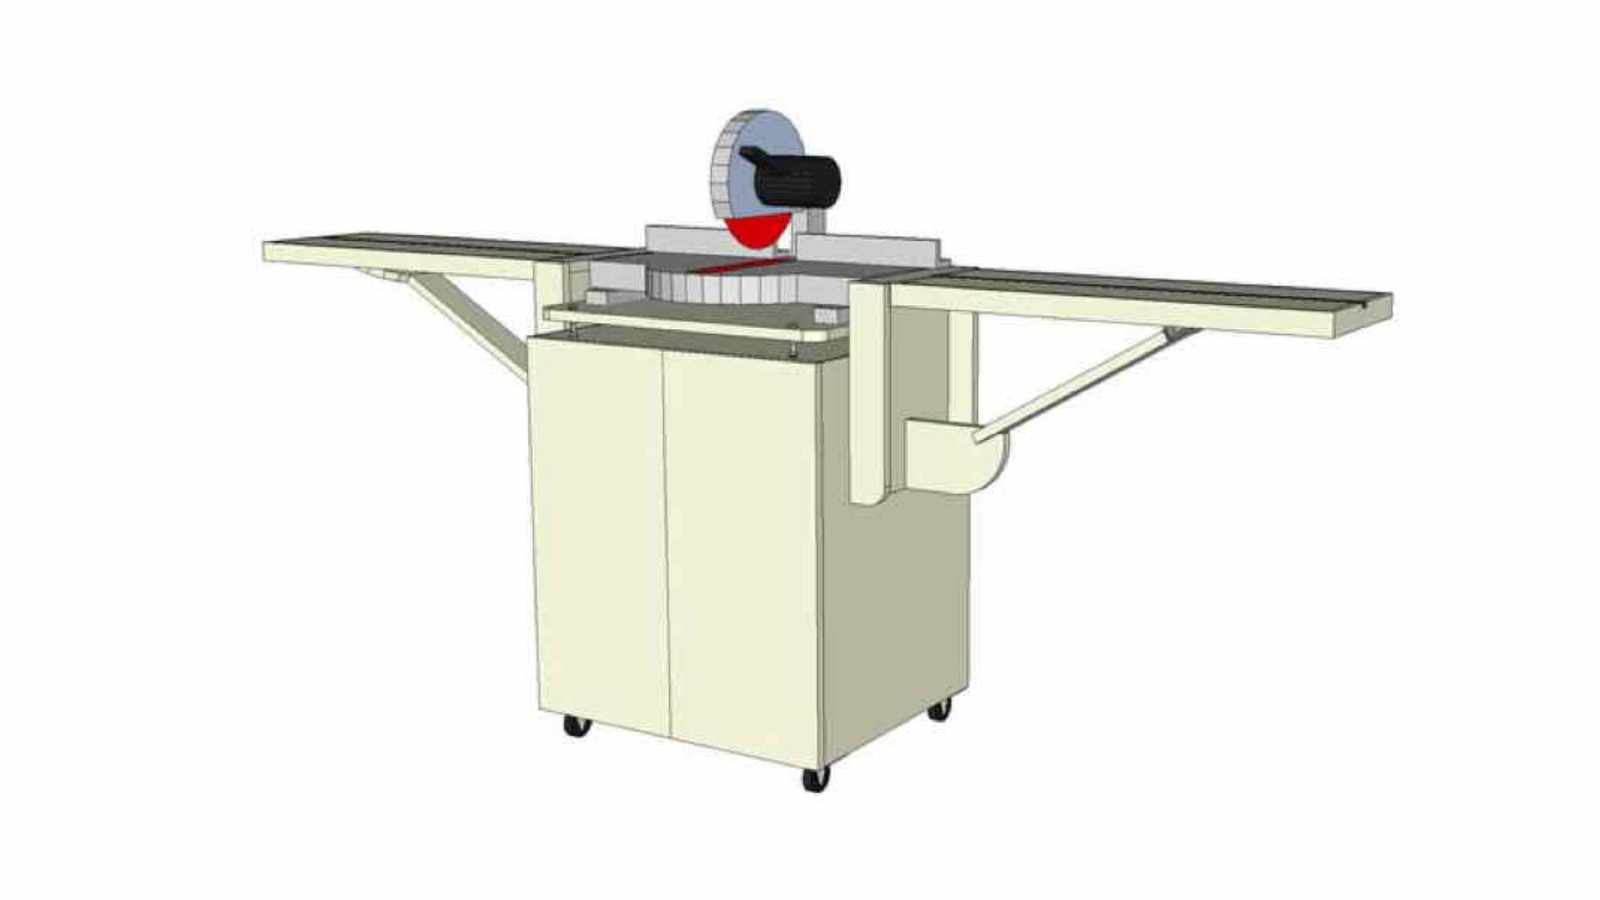
To address these challenges effectively, it’s essential to use the right tools, such as miter saws, circular saws, band saws, or abrasive saws, depending on the specific requirements of the project. Proper maintenance of cutting tools, including regular inspection and replacement, is crucial to ensure optimal cutting performance and prolong tool lifespan.
 
By understanding and addressing the challenges associated with cutting aluminum extrusion, it’s possible to achieve high-quality results that meet the project’s specifications and requirements. With proper planning, preparation, and execution, cutting aluminum extrusion can be a successful and rewarding process.